


11
SAND &
SNOW
For video/photography where bright background causes subject to appear dark
(silhouetted). Camera uses slower shutter speed to improve imagery.
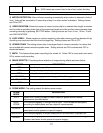
SPOTLIGHT
For video/photography where bright spotlight causes subject to appear too bright.
Camera uses faster shutter speed to improve imagery.
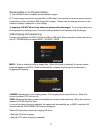
DIVING
Activates an electronic red filter to add back warm colors while diving at depths
between10’-30’/ 3 M-10 M in salt water. Below 30’/10 M, it is recommended to
deactivate DIVING mode and use a physical red filter such as Intova IFRED SP1.
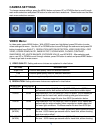
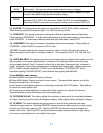
10) FLICKER: This setting allows the camera to be adjusted to AUTO, 60Hz or 50Hz to prevent
video flickering caused by fluorescent lights. For USA, the setting is 60Hz.
11) CONTRAST: This setting increases or reduces the difference between dark and light areas.
Default setting is STANDARD. To make dark areas blacker and light areas brighter in videos/photos,
select ENHANCE. To make dark areas less black and light areas darker, select SOFT.
12) SHARPNESS: This setting increases or decreases video/photo sharpness. Default setting is
STANDARD. Select SHARP to sharpen or SOFT to blur.
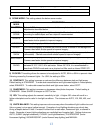
13) ISO: This setting adjusts the camera’s sensitivity to light. A higher ISO value will result in a
lighter video/photo and is useful in low light conditions. The choices are AUTO, 100, 200, 400, and
800.
14) WHITE BALANCE: This setting improves color accuracy when the ambient light is either too cool
(blue or green) or too warm (yellow/orange). Examples of cool lighting situations are cloudy day,
diving at depths below 20 feet / 6 meters in either fresh or salt water, fluorescent light, or scenes in
shade. Examples of warm lighting situations are candlelight and tungsten light. Setting choices are
AUTO, SUNNY (daylight situations), CLOUDY (cool light situations), FLUORESCENT (under
fluorescent lighting), INCANDESCENT (under filament lamp lighting) and MANUAL.
To use MANUAL white balance:
a) Select MANUAL and press OK button to activate.
b) Press MENU button 2 times to go back to main screen. The manual white balance icon will be
blinking at the top of the LCD screen.
c) Aim camera at white balance board or a white object and press SHUTTER button. White balance
is now set to current ambient light.
d) To reset manual white balance for a new ambient light situation, turn camera off and on to
reactivate blinking manual white balance icon and repeat step c.
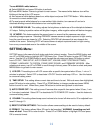
15) EXPOSURE VALUE: This setting adjusts the brightness or darkness of the video/photo between
±2 f stops. Setting to positive values will brighten imagery, while negative values will darken imagery.
16) AF MODE: This feature selects the general area in a scene that the cameras uses when
calculating image exposure. Selecting AVERAGE causes camera to adjust exposure to light coming
from the overall area as viewed in LCD. Selecting CENTER will decrease this area towards the
middle of the scene. Selecting SPOT will cause camera to adjust exposure based on light coming
from a very concentrated area in the middle of the scene.